
 gb
gb


- AtTrack - time tracker for efficient work
-
Desktop-application
- Instructions for Installing the MacOS Application
- Instructions for Installing the Windows Application
- Time Tracking Rules
- Launching Tracker
- Canceling Sending a Screenshot to the Server
- Switching to the Web Application
- Selecting the Language
- Configuring Automatic Launch of the Application
- Configuring Visibility of the Screenshot Window
- Instructions for Installing the Linux Application
- Active window autofill
- Managing the blur function in the Desktop application
- Frequently asked Questions
- Integration with Jira
- Integration with Trello
- Registration / Authorization
- Reports
- Results of the day
-
Web-application (site)
- Adding Corporate Domains
- Creation of Users
- Processing Access Requests
- Link Request to Access an Existing Account
- Creating Project Spaces
- Creation of a Project
- Adding a Member to a Project
- Creating Tasks
- Creating Positions in the Project
- Viewing the Recorded Time
- Deleting the Recorded Time
- Editing the Recorded Time
- A Request to Add a Working Time
- Processing Requests for Adding Working Time
- Uploading Company Logo
- Changing Company Name
- Adding Employees Positions to a Company’s Profile
- Uploading User's Image
- Choosing the Interface Language
- Changing the User's Name and Surname
- Changing Email Address
- Changing Password
- Create an Effectivity Template
- Edit effectivity Settings
- Connect an effectivity template
- Checking the effectivity of the employee
- Generating invoice
- Adding a Contractor
- Adding a customer
- Deactivating the user
- Choosing a pricing plan
- Paying the bill for the service
- Blurring screenshots
Paying the bill for the service
Payment for services is made at the end of the billing period on the 1st day of each month. Only the Administrator can view and pay bills.
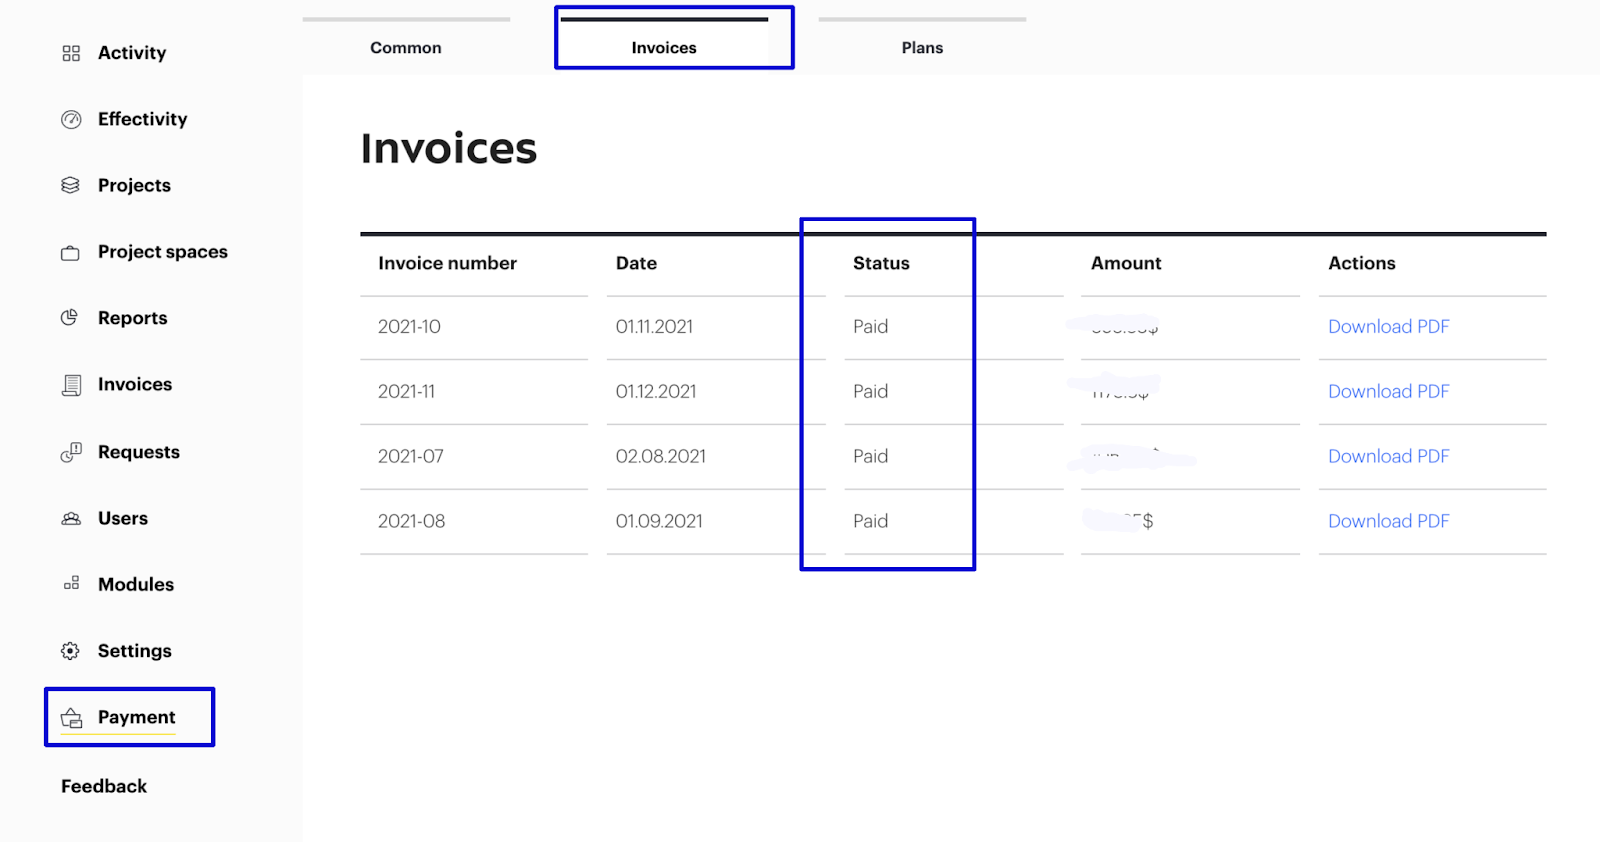
- Go to the “Payment for services” section
- Click on the ”Invoices" tab
This tab displays a list of your invoices. The new invoice has the "not paid" status.
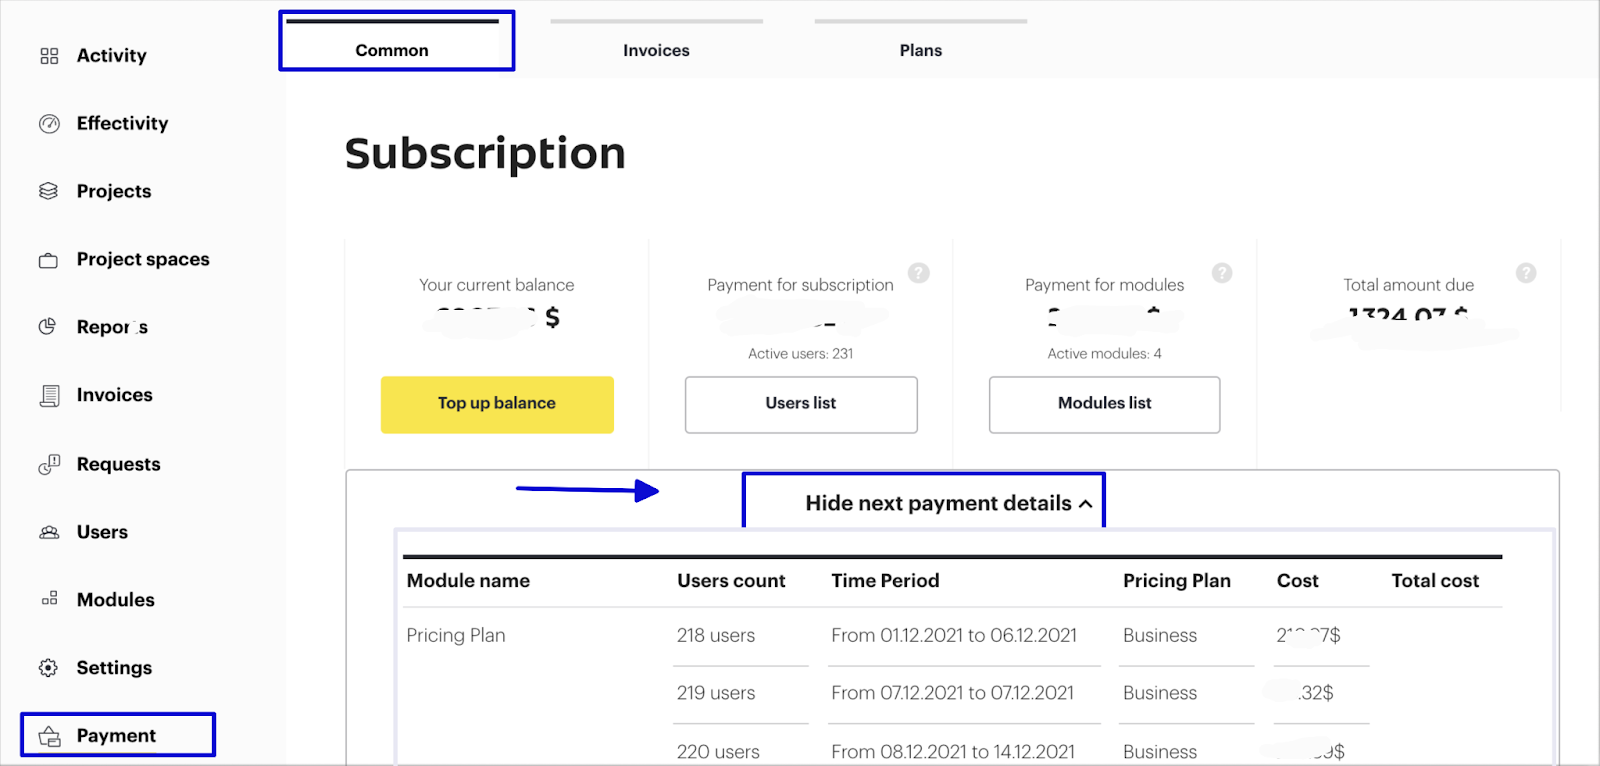
3. You can get acquainted with all the payment details.
Go to the “Common" tab and click "Show next payment details”. The information in the invoice may change depending on the number of users and module settings.
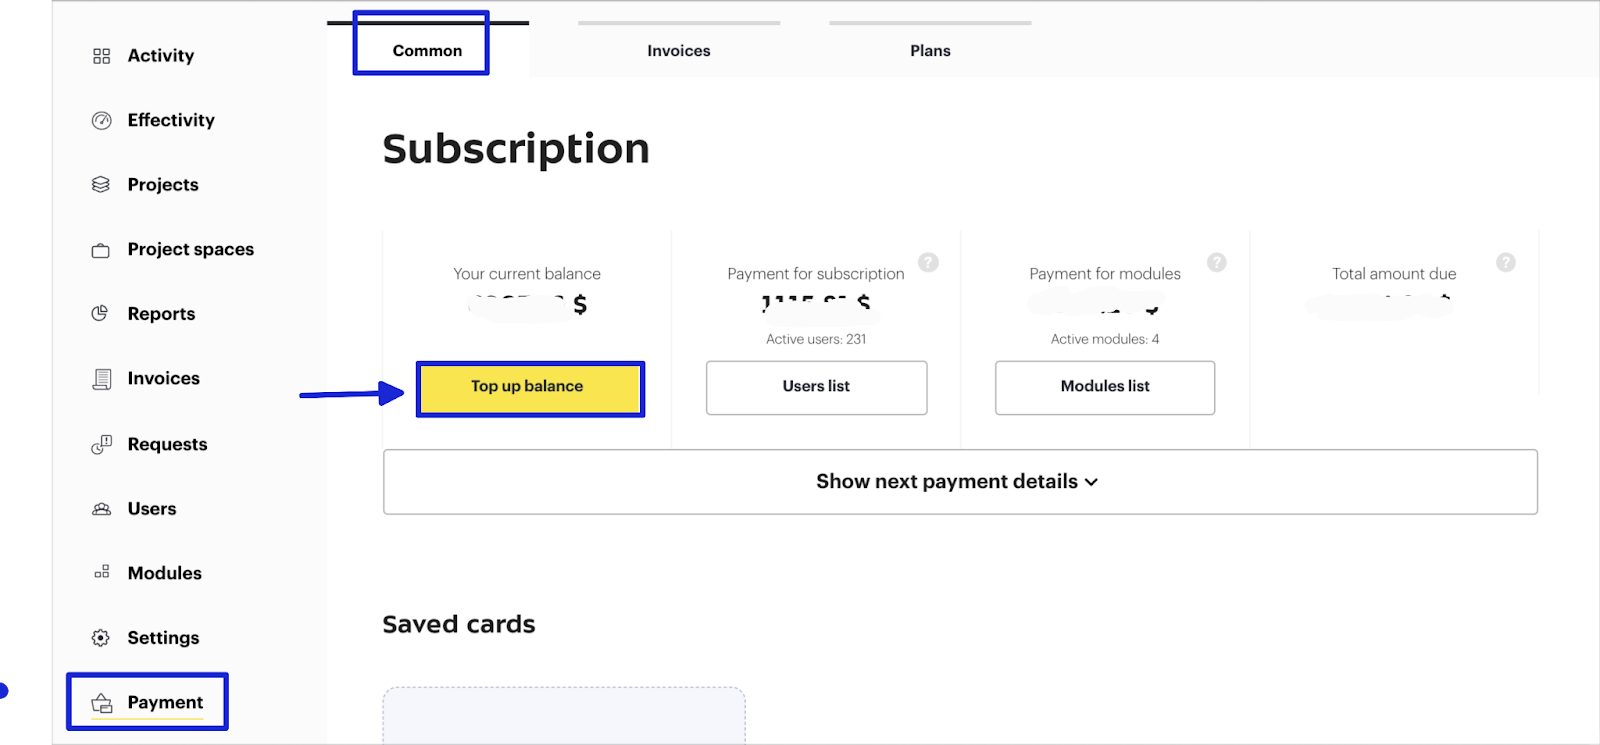
4. Press “ Top Up Balance in order to pay the bill
5. Fill in all the details and press “Payt”
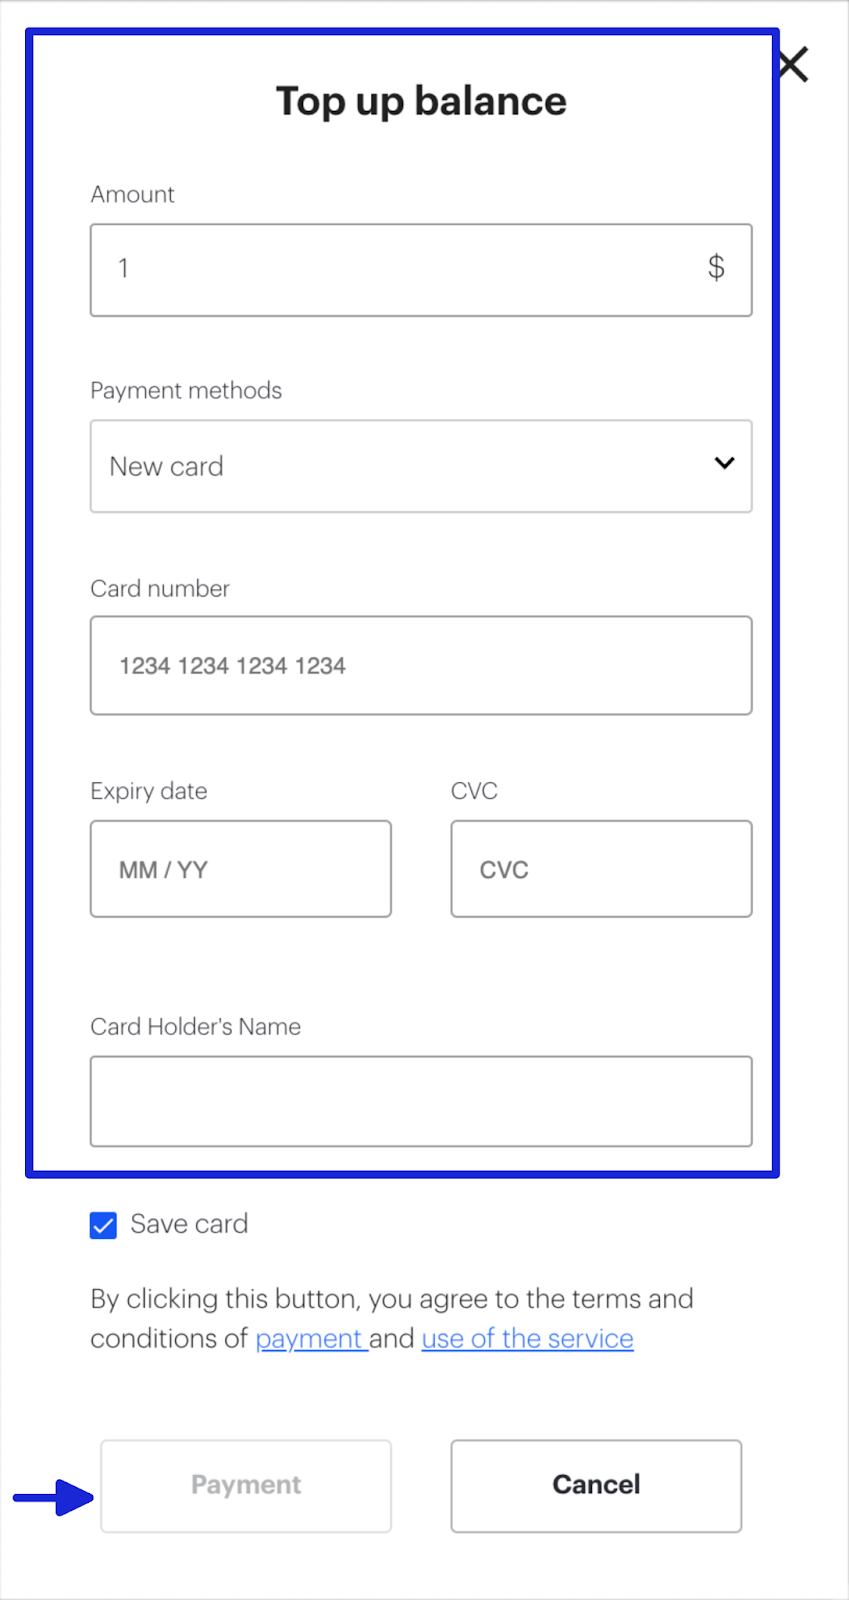
Payment will be collected automatically. The invoice will change the status into “Paid”
A month is given to pay the bill, if the bills are not paid on time, the company will automatically be switched to the "Basic" pricing plan.